Many folk craftsmen have long asked themselves the question: how to independently lay a laminate, observing all the technological requirements? Therefore, in this article we decided to tell about several convenient ways to lay the laminate and how to retain the laminate on the chipboard.
So, first, we learn what is a laminated panel.
Laminate is small thin sheets whose length reaches from 1 to 1.5 m, thickness - from 6 to 11 mm, the width is about 20 cm. Each panel has special locks along the edges, with which the panels are bonded with each other.
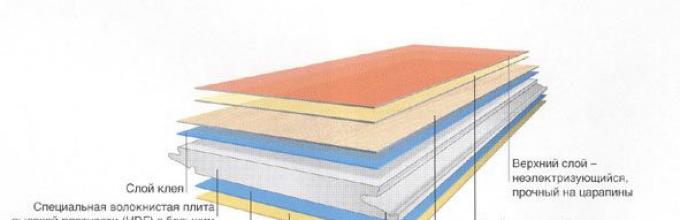
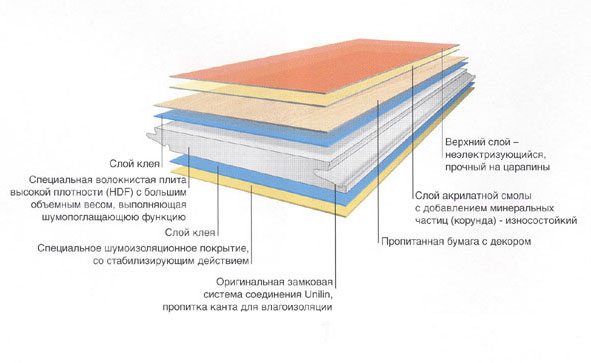
The surface of the laminated panel is covered with a reliable protective film providing material protection against solar radiation, moisture and mechanical damage during its operation. Second layer - paper reproducing natural wood texture, stone, tiles, sand, etc. Materials.
The basis of the laminated board is the economy of high density, which not only gives the strength of the entire flooring, but also by its function is the carrier layer. The lowest layer - paper impregnated with resins, which protect the carrier layer from moisture.
Preparing the foundation
The first and most importantly rule of laying of laminate with their own hands - the bought material should lie in the room at least two days. This is provided in the instructions for using the material: the laminate is adapted to the humidity, air temperature and the atmosphere in the room as a whole.
The material is purchased and passes acclimatization. What to do us? Before laying the laminate, take care of the foundation on which the new floor will be laid. If you decide to retain the laminated panels on the old board, then to start check the horizontal.
In a plot of 2 m², 2-3 mm is considered to be permissible height drop. But what if the differences are significantly higher than the designated norm? By asking the question that it is forgotten about such a beautiful finishing material as a chipboard for a laminate.
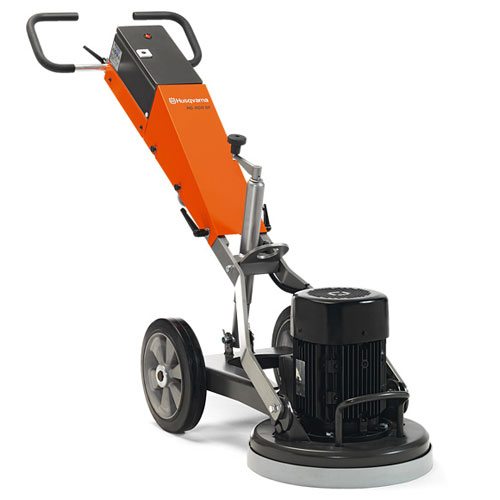
If you do not want to "lift the floor", then use an ordinary grinding machine that can be rented from any construction and repair enterprise.
If the "old" floor boards do not withstand the load and begged under weight, then the individual elements of the wooden floor are simply replaced by new ones. Using the chipboard, such a need to disappear - wide sheets of plywood, reliably attracted by self-drawing to the floor, align the working surface and create excellent conditions for.
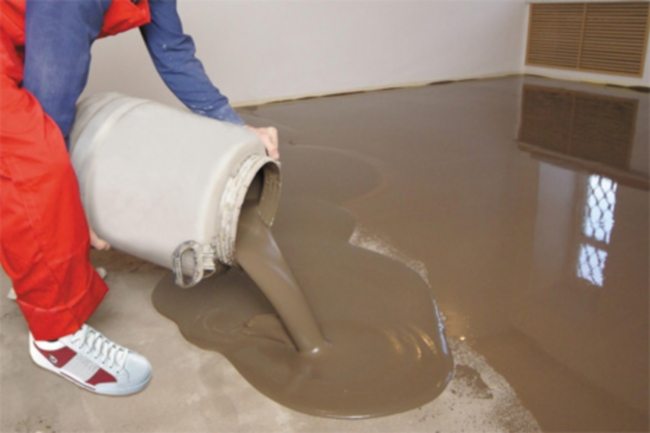
If you decide to lower the laminate on the concrete floor, then everything is the same as with a boardwalk. First, check the surface to deviate, and if any, we use a self-leveling screed.
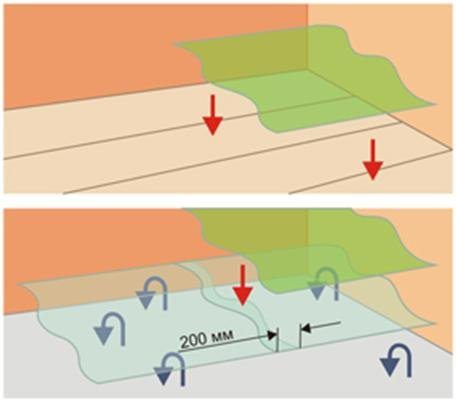
So, now directly about the halted under laminate. To the next stage of work, polyethylene flooring can be attributed, which performs a waterproofing function. The film should be treated perpendicular to the future direction of the laminate, and the allen strips should be at least 20 cm.

Attention!!!
How do laminate hallets and do not shift the film? We found a simple and right solution - the fastening of the joints of the film by the usual stationery scotch!
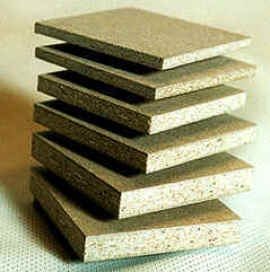
Now let's turn to the question - how to lay a laminate on chipboard? There is nothing complicated here. DSP will become an excellent insulator to maintain heat. Attached top of the concrete floor and polyethylene film, the DSP sheet will become an excellent working surface.
The home master only remains that laying out the laminated panels on the perfectly smooth surface!
Note!!!
In addition to the chipboard, the laminate can be laid both on the old wooden floor and on the linoleum.
Some citizens are stealing laminate on a high-elastic cork coating, the price of which is unlikely to please the ordinary ordinary man.
In general, to answer the question "what is better to sharpen under the laminate", first, it is necessary to estimate its financial capabilities, and only then proceed to the choice of material.
Laminated floor laying technology
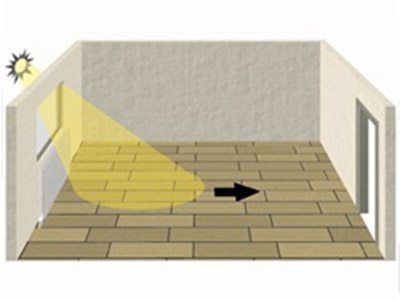
Now consider all available in different directions. If the windows in the room are located all on the one hand, the ideal solution will lay a laminate in the direction of incident sunlight. In the event that the light falls on the panel perpendicular to the joints, small shadows will be noticeable on the floor surface, which significantly deteriorate appearance.
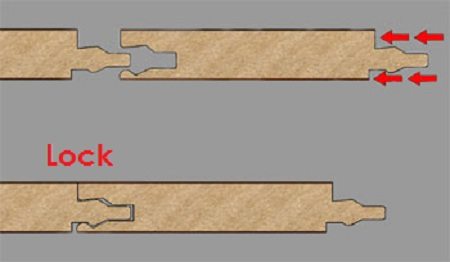
When we laminate laminate with your own hands, you should pay attention to the connection of the panels: it can be adhesive and blissful (lock). Laminate Laminate is also divided into 2 types: locks like "Lock" and "Click" type locks. The people of the "Click" locks are called even double castles or locks at an angle of 45 °.
The main advantage of the lock type "click" is a high strength indicator in connecting places and a low percentage of damage when laying laminated panels. As for the locks "Lock", they are more economical and easy to operate, but have a significantly lower clutch strength.
Laying of laminated panels: click lock systems
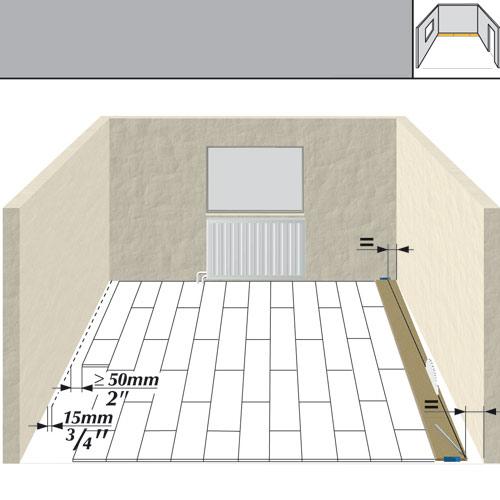
So, how to properly drain the laminate, equipped with "Click" lock systems? To begin with the width of the room with the help of a conventional roulette (this is necessary in order to immediately calculate the width of the panels at the wall). If you act according to the laying diagram of laminated panels, the panels located in opposite walls should have about the same width, which should be at least 50 mm (+10 mm of gap near each wall).

Laying of laminated panels begins from the very far corner located on the left. The direction of panels is focused on falling sunlight. Before laying a laminate, along each wall, it is necessary to place special wedges, the thickness of which is 10 mm (if you do not want to make them making yourself, in any construction store wedges are presented in a wide range).
The distance marked by wedges is the necessary gap between the wall and the laminated floor. After completion, the wedges are extracted.
If you study several different instructions, then in almost every one you can find the mention of gaps that perform the role of compensatory seams. In the event of a change in temperature and humidity, the laminate will not appear and see.
Note!!!
If the length of the room is more than 12 meters in length, then the gaps should be made even wider (the ratio of 1 mm of the gap \u003d 1 m of the length of the room).
We begin to lay the laminate: as stated earlier, the very first panel of Stalim in the far left corner. Next - from the end part of the first panel insert the second at an angle of 30 ° and snap.
In the same style, it should be continued until the wall is over. Subsequent rows should be chosen in a checker order: the connecting seam, by attitude to the first row, should be shifted by 40-50 cm. If you look closely, this order resembles a chess location.
Why do we install the panels in a chess order? This allows you to evenly distribute the load on the entire area of \u200b\u200bthe laminated floor, and not on the individual sections.
Attention!!!
There are several ways to lay a laminate - some home masters are stealing it diagonally, and someone by the method of parquet planks - Christmas tree.
Pay attention to the fact that the panel collapsed in half can be used to start or complete the new row, thereby significantly reduced the amount of waste.
So, we looked at the laminate, we will now consider individual nuances when working with laminated floor:
- Sometimes it happens that the whole range consists of solid panels. In order to start the following row correctly, the first laminated panel of the second row must be painted in half;
- Separate panels of the second row are not attached to the first! First you need to fully assemble the second row and then fix it to the first! (For laying laminated floor it is better to have at hand of the assistant);
- When connecting a series of each other, the inserted row must be shown at an angle of 30 ° (this will allow you to easily fit the panel to each other);
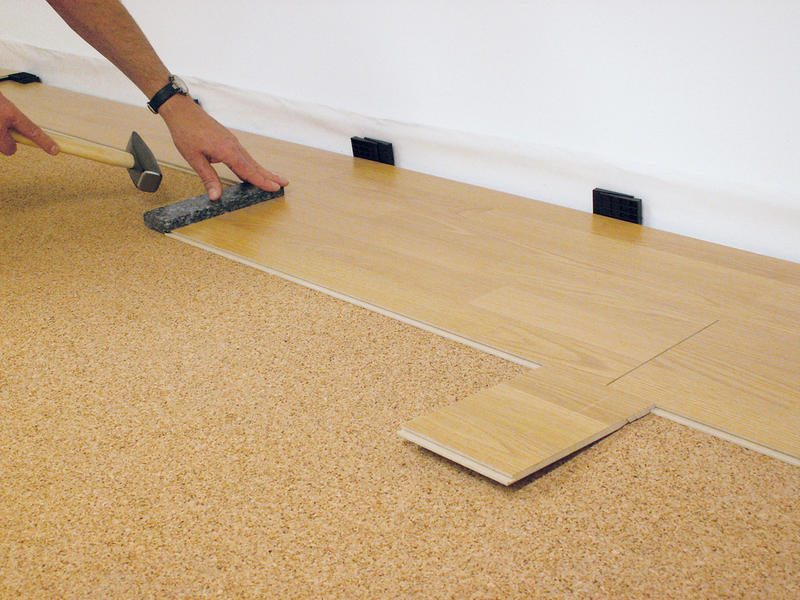
- In no case do not customize the rows of hammer blows along the locks (for this there is a special substrate under the blow, which will protect the locks and allow you to firmly fit the laminated panels to each other);
- The remaining rows are absorbed absolutely: we collect one whole row and secure it to the previous one by snaping;
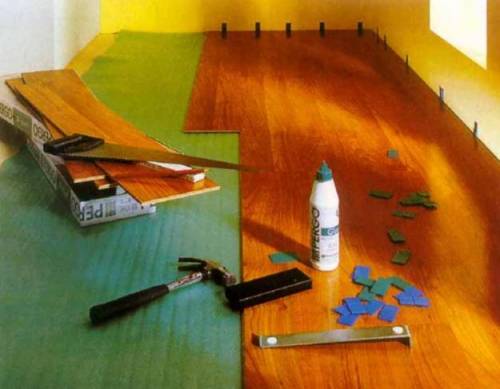
- Remember about the tool: Electrolovik, screwdriver, roulette, level, hacksaw, square, etc., must be constantly at hand;
- The main rule when laying a laminate is to constantly restore order. In the presence of garbage under the panels, during operation, they can appear or on the contrary! In addition, the small construction garbage will constantly remind itself with a creak and rustling under his feet.
Laying of laminated panels: lock systems like "LOCK"
Most home masters are wondering: how to drain the laminate with the locks like "Lock"? It is simple enough. Putting the laminated panels with locks "Lock", the spike of one of the panel enters the ladder, then follows with the help of a wooden bar and the hammer tightly adjust them to each other.
Before you begin to drain the laminate, you should calculate the width of the plates of the last row. Do not forget about the gap near the wall !!! If the width of the last row is too small, then we cut the first and last row of panels.
We begin laying the panels with the traditional, long-range left corner. We put on the floor the first laminate panel. To the end part, put the second panel and insert into a special groove.
Slightly bother with a hammer through a wooden bar. Next, according to a single scheme, we collect the remaining row.
Do not forget about the chess order when laying - the distance between the joints of the panels of two rows should be at least 30 cm. This will evenly distribute the load on the entire floor, regardless of the type of laying - vertical or diagonal.
Now consider how the second row is stacked: we take the first panel and lie strictly horizontally to the first row, tighten it according to the method of "spike in the groove" with the first next. Then, fasten the second panel with the first next, pre-retreating from the first panel of the second row by 2-3 cm. In order to connect the ends of the second row, neatly, through the bar, hacking them with a hammer.
Summarize
We reviewed only two ways to fix the laminate. There is also the third - adhesive, which every year is used more and less often because of its impracticality. Therefore, in this article we did not mention it. If something remains unclear to you on the issue - how to raise laminate with your own hands, then our site is represented as a photo and video instruction in which you can easily find answers to all your questions.


