Traditional material for designs - plasterboard. This ceiling can hide all communications in the interpatral space. You can make an ordinary, single-level ceiling, or complicate its design, making the ceiling by the zonator room.
Ceilings from drywall do it yourself: plan
The first step in great work will be the preparation of the plan in which the consumables are indicated, the drawing is required (especially if the ceiling, complicated), in the case of a figured ceiling, you may have to make templates.
Directly work will follow the following plan:
- Preparation;
- Installation of metal frame;
- Fastening sheets of plasterboard;
- Ceiling finish;
- surfaces;
- Finish finish;
- Installation of lighting devices.

Each of the steps can be made independently. The manufacture of such a ceiling is not the simplest undone, but it will not only highlight the surface, but also create - original and aesthetic.
Ceiling frame device
First you must make the markup of the ceiling horizontal plane. Usually, use the laser or water level. Alone to do it hard, it is better to enlist the help of a partner.
What should be done:
- Applying the level, put the labels around the perimeter of the wall. At least to which you can lower the ceiling - 3 cm, and if you are going to make embedded lamps, then their size will be the height of the ceiling.
- Marks connect each other. Make it just a painting thread. Seam the ceiling surface in order to install direct suspension and carrier CD-60 profiles.
- After completion of the markup, the guide profile is fastened. It must be installed not the walls around the perimeter of the room with orientation on the markup. Bashed profile need a dowel, the interval is from 300 to 450 mm.
- On the ceiling markup with an interval of 600 mm self-drawing and dowels, direct suspensions should be attached. At an angle of 90 degrees, lower their ends in the form of the letter P. 12-mm-hay self-drawing with a drill to the P-shaped suspension are recorded carrier profiles.
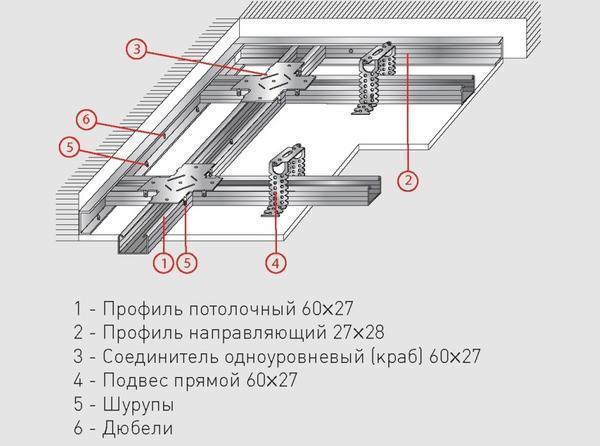
If necessary, profiles are joined by a direct connector, it, by the way, can be made from the carrier profile. Crabs are attached to the carrier profile with an interval of 600 mm. To do this, use the UD-27 profile segments. Connect them between the crabs and the guide 12mm sams.
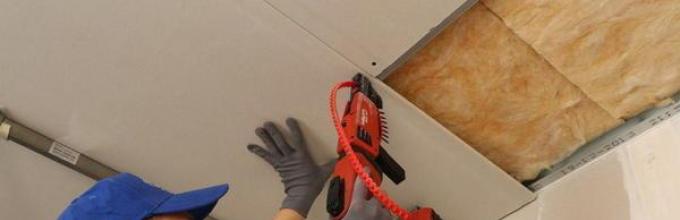
Handling plasterboard with your own hands: Step-by-step instructions
The frame is ready, but this does not mean that you can already roll down.
The work goes like this:
- Place the wiring into corrugated plastic pipes, rush the clamps to the slabs of the overlap. By planning the lamps, release the loops of the wires in the locations of lighting equipment.
- Then you can wash the framework. Start start from a solid leaf. Self-tag pitch - 200 mm. Put the first row correctly, the second is attached to the ceilings with the displacement. Be sure to joints the first row will be covered with a second-row plates of no less than a transverse profile (one).
- Mount GLK so that the walls remained a five millionth gap. It serves as a kind of compensation of humidity and temperature extensions of the material. If you do not do this, risks covered with cracks.
After the drywall is completed, crown and drill cut holes for lamps. Wiring loops are displayed through these holes.
Installation of a single-level ceiling of plasterboard (video)
Final stage mounting ceiling of plasterboard
The work is not yet completed, but ahead is perhaps the easiest and most pleasant stage. You need to sharpen the ceiling and close the seams. For this seams, we carefully treat primer, wait for the primer drying. Cardboard from sheets do not jog!
The usual putty for sealing seams is not used, it is necessary very durable, there are such in the line.
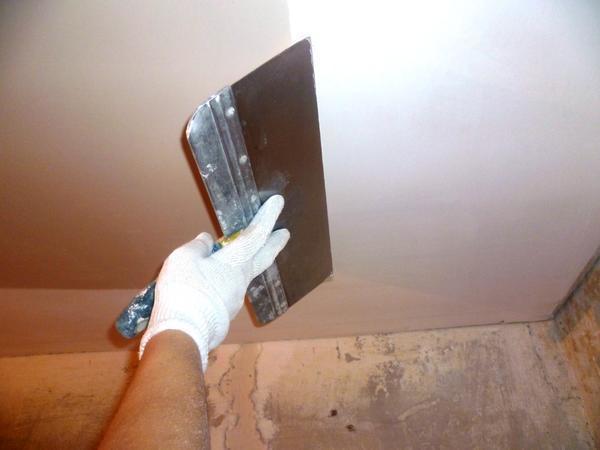
- Putclone Intelligent according to the instructions, first of all, close all the seams at the wall, then join the joints. Do not forget about the hats of self-tapping screws.
- To close the factory seam, first fill it with its composition, and then align the recess on the edge of the sheet.
- After drying the putty, stick to the seams of sickle. In the intersection it needs to be glued. Slightly still spread the putty and sickle to tempt, as well as small defects that remained. Place easier by an angular spatula.
- Strengthens the effect of protection against cracks glass cobweb. Even if some protrusions remained after seeding the seams, their further decoration will adjust them.
- After that, the seam-treated sho is rubbed (the method of shallow grout is used). It turns out a smooth, smooth surface.
- After the grout let the plasterboard dry, and then the seams again treat the primer. Then the finishing spacion layer with a fine-grained structure is applied, usually take a white putty.
Do not forget that work is carried out with closed windows and windows, there should be no drafts. Otherwise, the finish can be a story, and cracks, too, with such a disturbed mode of operation, can not be avoided.
The finish putty is not conducted if you are going to be saved or other decorative options (glossy coating). You just need to sharpen joints, and align the surface after the seams.
Putchawing of drywall seams (video)
Such a "sandwich" from cardboard and gypsum as GLC is almost in any house can be the future beautiful and original ceiling. Spying ideas in the photo gallery, make sketches, outline the plan, and the independent ceiling will become your pride.
ATTENTION, only today!


