By purchasing a ready-made wardrobe or manufacturing it to order, you overpay at least 50% of its cost. In fact, the cost of making a wardrobe is approximately 20-30% of the amount indicated on the price tag. At the same time, it is possible to design and collect the wardrobe with your own hands without possessing special knowledge and tool.
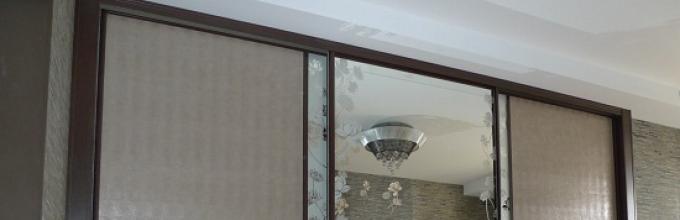
The wardrobe is made using cabinet furniture technology. The essence of the technology is that all the elements of the cabinet carry a structural and functional role simultaneously. All cabinet elements with the exception of doors and rear walls are made of LDSP. The rear wall is made of MDF. Doors can be manufactured from various materials, but the most popular mirror or glass uses the greatest popularity, or their combination. Often a mirror or glass decorated with a pattern.
Increase 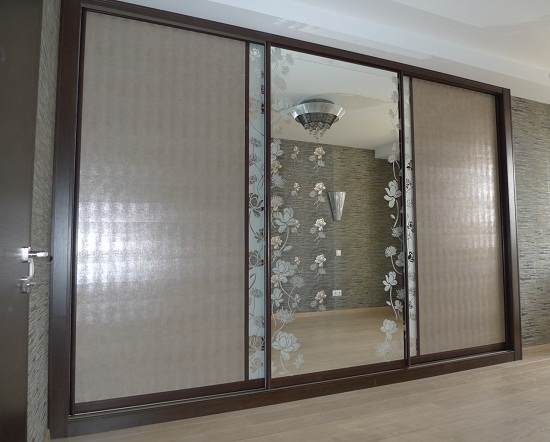
Fig.1.
There are two types of cabinets: normal and built-in. From the point of view of the design, these types of cabinets are different. The built-in closet can distinguish two main differences: the absence of base and visible structural elements of the cabinet. Usually the built-in wardrobe is installed in the wall niche.
Increase 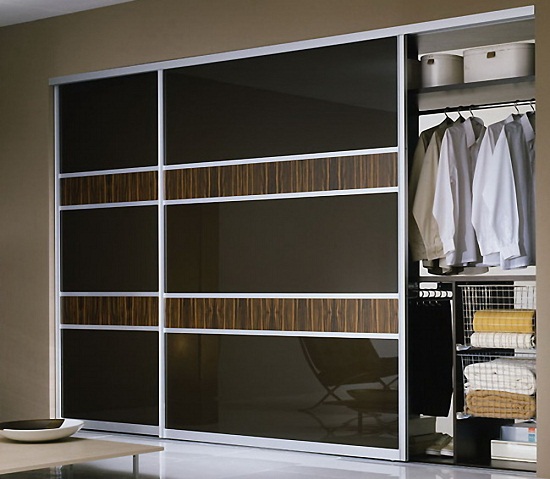
Fig.2.
Cup Design
The design of the cabinet is started with the determination of overall dimensions. In this case, the height of the cabinet is usually less than the height of the room by about 5 - 10 cm, in which the cabinet is installed. The length of the cabinet depends on your preferences and free space of the room.
Separately, it should be said about the width of the cabinet. The traditional width (depth) of the wardrobe is 60 cm. Such a wardrobe is enough to, it was possible to hang clothes on the hanger across the cabinet. However, the width can be made arbitrary. Usually, with a lack of space indoors, the cabinet makes a width of 40 - 50 cm. In this case, the clothes can be hung across the cabinet, for this purpose there are special suspensions.
Increase 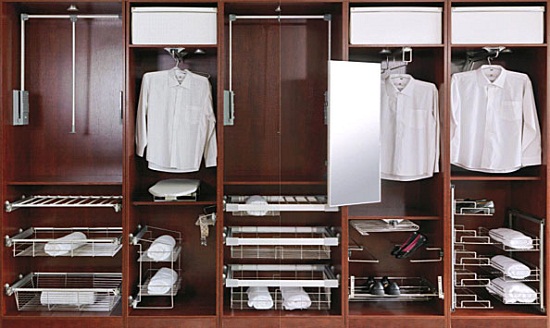
Fig.3.
Having determined the overall dimensions of the cabinet compartment, you can begin to create a drawing. At this stage, you can read the housing (side and top walls) and the cabinet base (floor of the cabinet).
Traditionally, the floor of the cabinet is from the floor of the room by 5 cm. This design forms the base. From the facade of the wardrobe, the space between the floor of the cabinet and the floor of the room is closed by the bar from the same material from which the cabinet is made. Wherein the bar is removed deep into the cabinet for 1-2 cm.
Increase 
Fig.4.
Thus, we got a frame of a wardrobe. It is important to note that now there are dimensions of the inside of the cabinet. For the design under consideration, they make up: length 1968 mm, height 2518 mm. Based on these sizes, you can proceed to the design of shelves and partitions (filling the cabinet).
Filling a wardrobe can be arbitrary, Consider possible options further. At first, a few words about the traditional approach and features of some structural elements of the wardrobe can be said.
Cabinet - This is a sliding structure that consists of a minimum of 2 doors. A special mechanism consisting of several elements is used to move and attach the doors. Two important points should be noted: doors size and sizes of the required place to install doors.
Unlike the cabinet itself, the sliding doors, as already mentioned, consist of several elements: guide, tire, profile and inserting doors. All the necessary accessories for the manufacture of sliding doors of the wardrobe can be purchased separately. However, if the cabinet elements and its assembly can be made with their own hands, then the cabinet doors are better to custom. This is due to the complexity of manufacturing sliding doors, especially in the presence of mirrors and glass elements. To order sliding doors, the internal size of the cabinet will be required. And, of course, you will have to choose the design of the door.
The second important point is the overall dimensions of the sliding doors, the dimensions of the internal shelves depend on it. Traditionally, 10 cm of the cabinet space is removed from the door-coupe. Thus, regardless of the filling option, the shelves width will be 10 cm less than the width of the cabinet. In our case, 50 cm.
Increase
Fig.5.
Filling a wardrobe
Before describing the several most popular wardrobe options, consider the standard option that is suitable for any cabinet this shelves. The most important point is the overall dimensions and the mutual layout of the shelves. This is the key to a good ergonomics of a wardrobe and the convenience of using it.
So, for example, a closet 200 cm long and 260 cm height is selected. The cabinet of such dimensions (or similar) is often installed in the hallways and bedrooms. Such a cabinet is obtained very compatible. It is well suited for storing clothes and shoes, as well as bed and other linen. The most optimal completion option is as follows: On the sides, two rows of shelves are installed, an antlesol shelves are made at the top of the cabinet, the lower part of the cabinet is given to shoes.
Increase 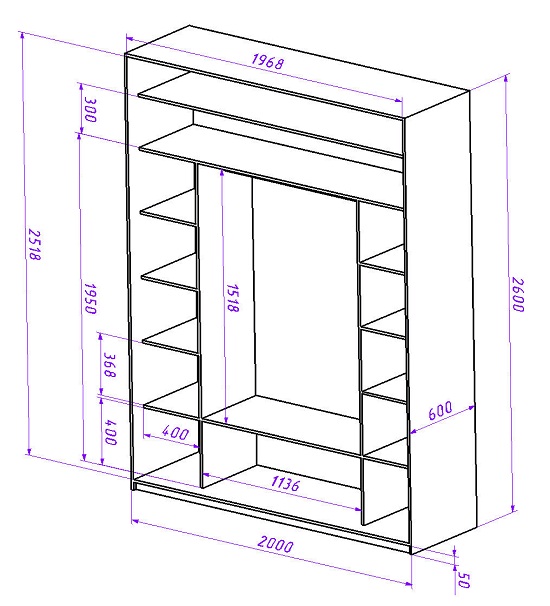
Fig.6.
The central part of the cabinet is a niche with a crossbar. This department is intended for outerwear, dresses, blouses, costumes, etc. Clothes are hanging into the cabinet on the crossbar. A pipe with a diameter of 25mm can be used as a crossbar. Meaning a special furniture chrome rod. The bar is located in the middle of the niche, from the upper side make an indent 10-15 cm. Mashed to the walls of the cabinet with the help of flanges by self-draws. If the length of the rod is more than 1 meter, then a special suspension is installed in the middle of it to ensure the strength of the structure.
Increase 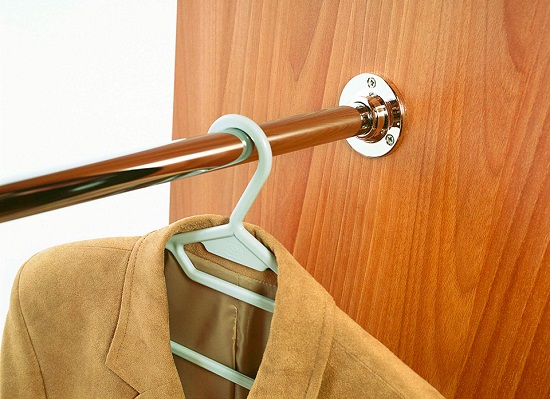
Fig.7.
Please note that the pipe is located at a distance of about 180 cm from the floor. This is the most optimal distance to make it easy to hang and remove clothing. It is also important, the fact that the height of the niche is 150 cm. You can hang a fur coat or coat in such a niche, while they will not touch the lower shelf.
Niche for shoes Located under the central part. The height of the niche is 40 cm. This size is enough so that you can put the boxes with shoes in two tiers. A niche for shoes is separated from the central section of the partition it will protect against dust for outerwear. Also, this partition is important to give additional stiffness to the cabinet.
Shelves are located on the sides of the wardrobe. You can store any things. Shelves size: Length 40 cm, height 35-40 cm. If the length can be arbitrary, then the height should be designed in the range of 30-40 cm. The shelves will be the most functional.
In the upper part of the cabinet there are antleesol shelves. They have low availability due to the fact that they are very high. They can be used to store rarely used things, or for storing seasonal things.
The considered traditional version of the design of the wardrobe is universal and convenient to use. However, if you use modern accessories for wardrobes, you can choose more successful options. You can illustrate this statement on the example of identifying the shortcomings of the described design and considering the ways to eliminate them.
One of the shortcomings is the small availability of the mezzanine shelves. To eliminate this deficiency, you can moving the compartment with the upper clothes to the place of the mezzanine, applying a special mechanism.
Increase 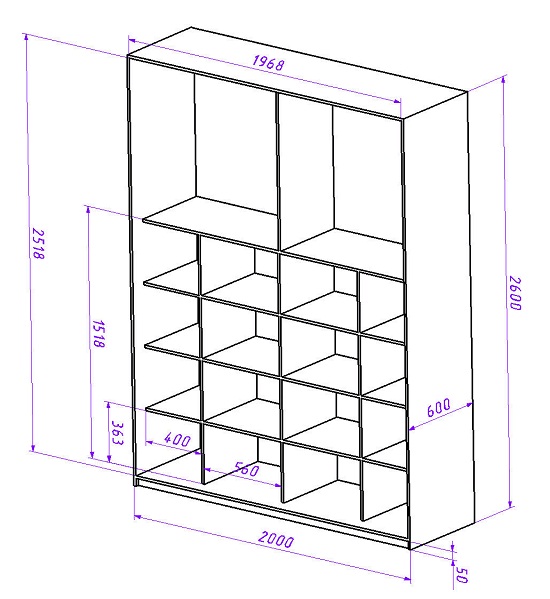
Fig.8.
Thus, it turns out that all the lower space is used under the shelves, which are at an affordable height, and the upper part of the cabinet is used for outerwear. It provides a special mechanism that can lift and lower clothes to accessible to the height.
Increase 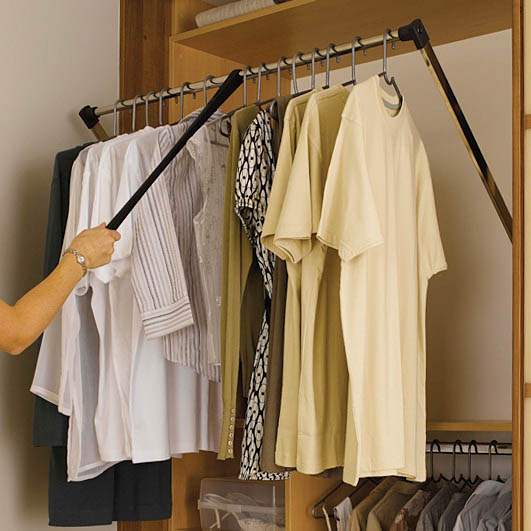
Fig.9.
Another example of disadvantage There is a case when a width of 60 cm does not allow the space space. In this case, for outerwear, you can apply a special mechanism for a canopy along the cabinet. There are several types of such mechanisms.
Increase 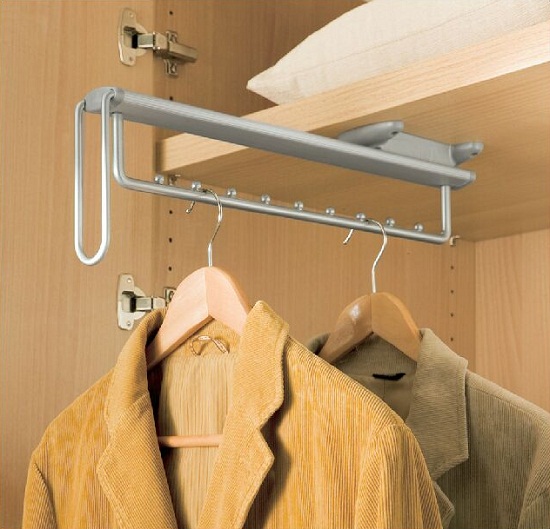
Fig.10.
Also when filling the wardrobe can be used special retractable laundry baskets. They can be used instead of the shelves and in combination. Despite the fact that we discussed several universal filling solutions, there are still many different options. Creating an ideal shelf system for you is limited only by imagination. Fig.19.
The built-in wardrobe uses no less popular than traditional, due to the fact that due to its design, it looks like a little bit like a closet, and more like a way to create, even if not big, but independent dressing room. The built-in wardrobe is usually suitable in the niches of the walls, or this niche is specifically satisfied. Thus, the visible part of the cabinet remains only sliding doors coupe.
Increase 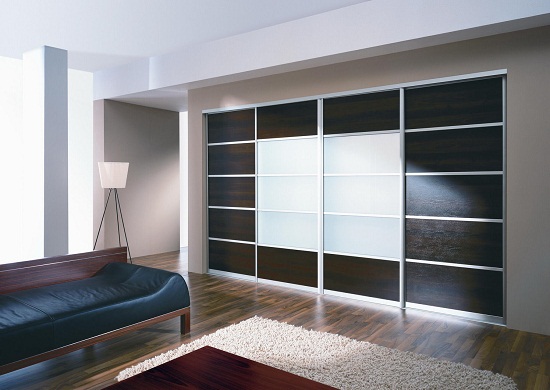
Fig.20.
One of the indisputable advantages Built-in wardrobe is a smaller cost of its manufacture. This turns out due to the fact that the embedded cabinet does not have a part of the design of a regular cabinet, for the built-in they are simply not needed. These elements include gender, base, ceiling and side walls. If you use specialized systems for filling the wardrobes, then you can do without structural furniture elements in general.
Increase 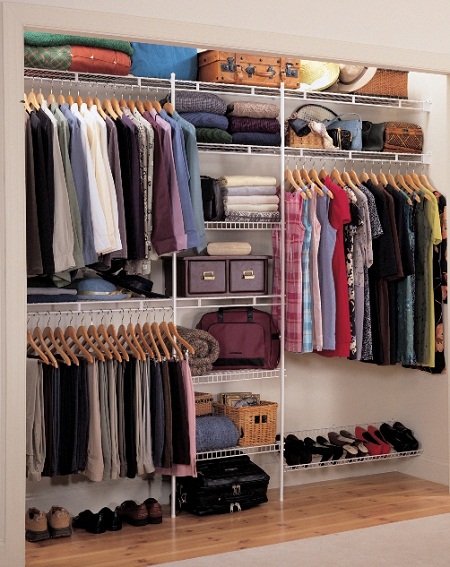
Fig.22.
Building a built-in wardrobe Consists of two parts: the organization of a niche for a cabinet and internal shelves. Since the wardrobe systems are expensive than the design of LDSP, then preferences are preferred. In fact, the shelves system is an independent cabinet, with the exception of some individual sections. The high advantage of the built-in cabinet is the simplicity of the shelves assembly, due to the fact that there is no need to use a broken fastener. This will be discussed in detail below.
How repeatedly mentioned the wardrobe is arranged in niche, i.e. The walls of the room are used as the side and rear walls, as a floor and the ceiling of the cabinet, the floor and the ceiling of the room, respectively.
Increase 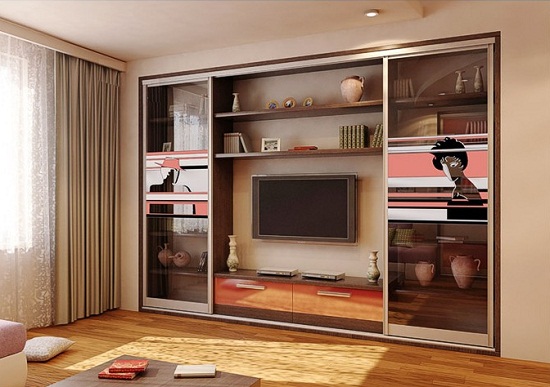
Fig.23.
Problems arise when niches are not. In this case, the niche is made of drywall or completing the latter wall from it. However, if the repair is already made, this option does not fit. Therefore, quite often one of the walls are made from LDSP. As a result, a certain intermediate option is obtained, because part of the structure is a traditional wardrobe, and part of the built-in.
Increase 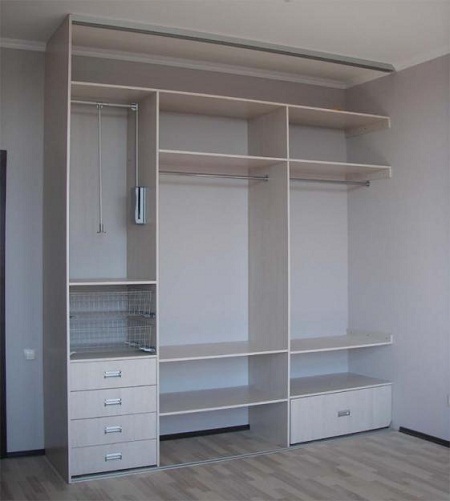
Fig.24.
Designing the built-in wardrobeAlso, as the usual, begin with the definition of its overall dimensions. In fact, the overall size of the cabinet determine the overall dimensions of the niche. The size of the niches will be the installation dimensions of the sliding doors, so they can be ordered immediately. The remaining elements of the built-in wardrobe are not associated with the doors, which allows you to modify the cabinet during operation, adding or removing the unnecessary items, which is still one dignity of the built-in system.
Build fitted wardrobe (Shelves) practically does not differ from the assembly of any furniture from LDSP, detail about the assembly is written below. The main difference is the installation of sliding doors. The guide and tire are fixed not to the elements of the cabinet, but directly to the ceiling and the floor. It is important here to observe that both elements are in one vertical plane. Otherwise, the door can be twisted. It is also important that the floor is even differently possible spontaneous opening / closing of doors.
Fig.29.Assembly
The order of assembly of the cabinet-compartment depends on the design of the cabinet. Since each cabinet has a practically a unique layout, the universal instruction for assembling the cabinet simply does not exist. However, for most cabinet designs there are several specific rules and techniques, observing which you can collect a wardrobe of any design.
Assembly of the wardrobe, it is advisable to start with the outer walls and vertical partitions that are attached to the floor and ceiling of the cabinet, after which the inner shelves are collected. It should be noted that if the wardrobe has a height of equal or slightly below the height of the room, then collect the cabinet is quite difficult.
When assembling the cabinet, several types of furniture fasteners are used: an eccentric screed, confirmation, power suppliers and a furniture corner. Eccentric screed This hidden fastener is used for the combination of the floor and the ceiling of the cabinet with the side walls. The confirmation is used where it is necessary to connect the parts, and the fastener does not make sense, for example, for mounting the shelves inside the cabinet or for assembling the shelves system for the built-in wardrobe. Power holders are used for freely fixed shelves. The furniture corner can be used to fasten the shelves or for fixing the secondary elements. Such as a bar of the base.
When assembling cabinet furniture apply the following approach To the assembly, first collect individual elements, after which they attach them to the already collected. All assembly leads on the floor. If the cabinet is approximately equal to the height of the room, this assembly option is not suitable. The assembled cabinet in the horizontal plane will not be able to install in place, because will interfere with the ceiling. Therefore, the cabinet frame must be collected immediately at the place, and the shelves can be installed in the next step.
To understand the order of assembly and appointment of fasteners, I propose to consider the procedure for assembling the previously designed cabinet.
Increase 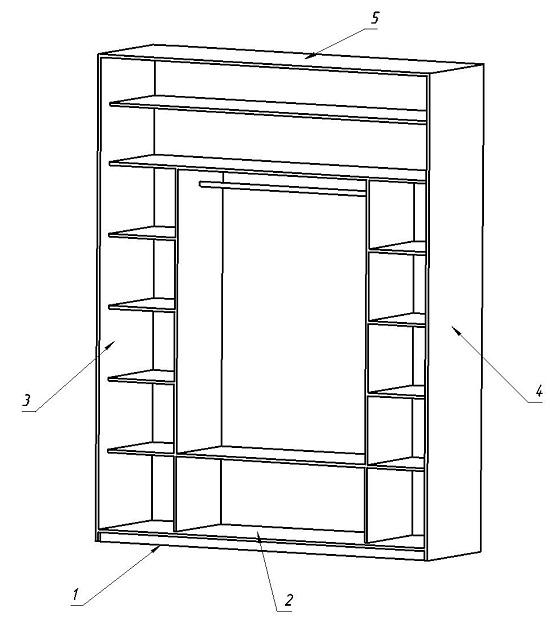
Fig.30.
As already mentioned, the cabinet assembly starts from the frame, i.e. First, the side walls are harvested, floor parts, ceiling and basement. To ensure the hidden fastener, an eccentric screed is used for assembly. The eccentric screed requires the presence of mounting holes, so at first they make an additive.
After all the holes are ready to start assembling. The first thing is collected by the floor and base. The base plate (1) is fixed by the floor cabinet (2) floor element with furniture corners.
To the collected semi (2), the side walls (3, 4) and at the same time the ceiling of the cabinet (5) are fixed. Make all manipulations are quite difficult. Therefore, it should take care of this and invite the assistant.
Increase 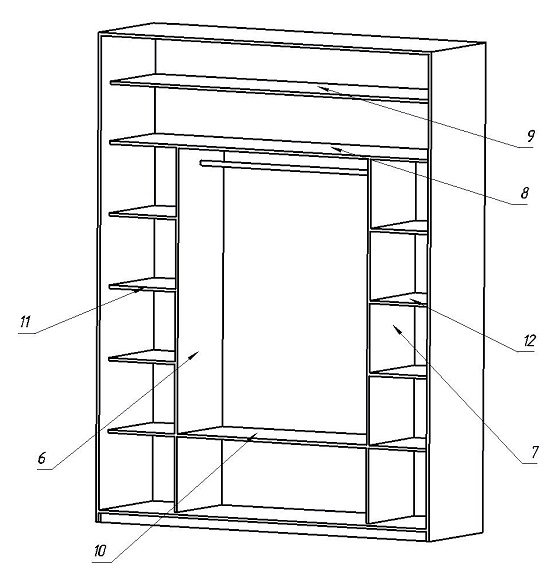
Fig.31.
After the frame is assembled you can proceed to assembling internal shelves. First, elements 6 and 7 are installed, they are fixed to the floor using an eccentric screed. Element 8 is attached to them. The element 8 can be fixed both eccentric screed and confirm. To the side walls, the element 8 can be fixed with the power holder. Also, the elements 9,11 and 12 are fixed using the Power Supporter. Element 10 It is more convenient to fix confirmation to the confirmation, in addition it will give a closet-compartment of more stiffness. The remaining shelves can be fixed in various ways, for example, with a furniture corner or a fixer without fixing.
After the cabinet is assembled with the rear wall of the MDF. Next set door coupe. The ceiling is fixed in the guide flush with the cabinet facade, on the floor - rail. After that, the doors are inserted.
Door adjustment
The last stroke of the cabinet assembly before use is the adjustment of the door-coupe. At the door coupe there are two adjustment elements: a stopper and vertical adjustment.
Stop Designed to fix the door in the position closed. The stopper is located in the tire, which is fixed on the floor of the cabinet. It is a special bracket. Which is installed in the tire grooves. Having moved it along the tire sinus, this position should be achieved when the door-coupe fits tightly to the side wall of the cabinet.
Increase 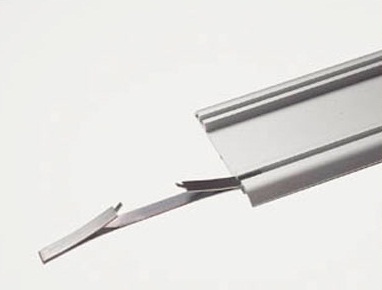
Fig.32.
The second element of regulation is adjustment in height. With this adjustment, the required door rise is ensured so that it does not cling to the bus when moving. The adjustment element is located on the wheels of the door. To adjust the hex key. With it, it rotates the screw of the adjustment mechanism to achieve the required gap from the bottom of the door and the required position position.
Fig.33. Adjusting the wheels allows you to raise and lower the door, or eliminate the slope. You need to regulate two wheels at once. The adjustment is trying to align the door and make the minimum gap between the bus and the door, so less dust will fall into the closet.
We reviewed the entire circuit wardrobe cycle from design and ending with assembly and installation. As you can see from the above, the most time occupies design. Indeed, this is the most important and difficult stage, it contains the entire functionality of the cabinet and the convenience of using it. At the same time, the design itself is quite simple and does not require any knowledge and skills, so it will cope with this forces to everyone.
Cabinet assembly can cause some difficulties. The main thing is the need to drill holes under the screed. If you are alarming this work, you can progress yourself from possible errors, having ordered the additive of the holes simultaneously with the production of cabinet parts. This approach will simplify the work on the assembly repeatedly, but the wardrobe is somewhat announcing the price.
Despite the possible difficulties, designed and collect the wardrobe with their own hands you can save up to 70% of the cost of the cabinet. And unlike the standard, the wardrobe made with your own hands will fully fit into your interior and 100% satisfy your layout and filling needs.


