
We are often asked the same question, is it possible to engrave with a diode laser on a metal, for example, aluminum.
Is it even possible to engrave on metal at home?
Today we will answer this question.
Consider aluminum. In fact, it is quite common in everyday life metal, suitable for engraving. Many products, for example, charms, flash drives, cases of some mobiles have an aluminum coating.
What do we know about aluminum?
It is a metal with a melting point of about 600 degrees Celsius, which has a high thermal conductivity and, as a rule, has an aluminum oxide film on its surface, whose melting point is greater than 1000 degrees Celsius. This greatly complicates the process of engraving by heat treatment, but there is another option. Aluminum is a good conductor, and if so, then the process of electrolysis has not been canceled. Here it is the very decision about which we will tell.
This process is called aluminum etching.
There is nothing complicated about it. We only need a current source of 9-12 volts.
As well as ordinary salt NaCl, a container of dielectric (plastic is quite suitable), a nail or any iron object of suitable shape and size, water.
And, of course, the laser!
So what do we do?
We are preparing a raster pattern that we would like to put on the aluminum surface of the plate.
For example, like this:
1. 2. We cover the aluminum surface of the plate with a protective film (adhesive tape, varnish, paint of choice) .3. Place an aluminum plate on the desktop of a 3D printer equipped with a diode laser (preferably more than 1-2W power, so that it is enough to cut the film), and turn on the laser cutting mode (to burn the glued film and create open areas in the future engraving ).four. Next, in a plastic container, we prepare a concentrated aqueous solution of NaCl.5. From the source of electrical current we derive 2 wires "plus" and "minus".
6. We add an iron object (nail) to the minus and drop it into an aqueous solution of NaCl.
7. To the plus, we attach our aluminum plate and also lower it into the salt solution.
8. We supply power to the current source.9. The process of electrolysis (etching) in the solution begins. Depending on the strength of the current and the concentration of the solution, you can estimate the approximate time required for etching. Usually 3-5 minutes. We take the product out of solution. It must be remembered that the product to be engraved should be carefully isolated before being placed into the solution, except for those areas where it should be applied.
This process can be carried out both at home and in a small workshop. With this technology, anyone can become a master of metal (aluminum) engraving.
In our opinion, this technology has great practical value.
Subscribe to Endurance updates.
Engraving on aluminum is easy!
There are a great many ways of engraving on metal, but they all require either special, and sometimes far from cheap equipment, or some specific skills, or these methods are quite complex. For example, take a chemical engraving. Again, we need some funds that may not be in the apartment at all. But how can it be, if you need to urgently make a permanent inscription on the metal, but there is no equipment for this? But the output is always there, read more under the cut :)
In order to assemble the simplest engraving machine we need:
1) Incandescent bulb (optimally 100W, the greater the power, the greater the current, and the greater the current, the deeper the etching will be), the cartridge to it with connected flexible wires not less than 20 cm long. Any consumer can be used instead of the bulb. no pity.
2) Strong cable, the cross section is selected based on the power of the device. For incandescent bulbs 100W - the best section will be 1-1.5 square. You can put less, but not desirable.
3) Insulating tape, mainly rag. PVC can also be used, but a rag can better withstand high temperatures. If there is no electrical tape at home, you can use plastic tape.
4) Ordinary graphite pencil. The shorter the streamer the better.
5) Still short wiring ...
6) Screwdriver (shown on the photo as well 5, typo). In addition to the screwdriver, it would be desirable to have a phase indicator, but if it is not there, then do not worry.

We now turn directly to the assembly of our apparatus.
At one end of the wire (2) we make an improvised plug, if there is an extra full-fledged plug in the apartment, we place it on one end of the wire. Then these two sticking out wiring will just be plugged into the outlet.

From the other end of the wire we do the same thing, and we put the terminals on both cores. If there are no terminals, nothing terrible, then just we clean the wires' wires more.

Next we need to the core on which the phase will be attached to attach the wire from the light bulb. It is more convenient to do this through the terminal strip as in my photo, but if there are no terminal blocks, you can do with twisting.
To the core on which there will be a “zero” - we attach the wiring, stripped from two ends, about 20 cm long. We attach as you like, you can by a terminal block, you can twist it, you can by “Vago” terminals. You should get something like this:

Now we take an ordinary pencil, sharpen it on one side, and on the other, remove a layer of wood. The shorter the pencil, the better. 
Next, wind the wire from the bulb onto the pencil. It is necessary to apply tightly, if there is a bad contact, an arc will arise between the wire and the rod, the engraving will not be obtained and the pencil will burn.

We roll up the junction of the rod of the pencil and the wire with tape. As I wrote above, it is better to use a rag tape, as with poor contact between the wire and the rod, this place will be heated, and the rag tape can withstand temperatures better than PVC tape. If there is no cloth, of course, you can use PVC, and if there is no PVC tape, a clear plastic tape can be used.

Well, that's all, our device is ready. When assembled, it should look something like this:

Now let's move on to the engraving process: we connect the “Zero” to the part on which we will do the engraving, on the pencil we have the phase going through the light bulb. Before you begin, you need to make sure that the part is exactly zero, and not phase. To do this, you can use the indicator, and if there is no such handy, connect the part to the heating battery, plumbing riser, towel warmer, in general, to any grounded object. If the bulb lights up, it means that there is a phase on the item to be engraved. In this case, just turn over the plug in the socket, check that the light does not light up again, it means everything is fine, and you can get to work.
With a pencil, we begin to touch the part, at this moment a spark should pass between the part and the pencil, and the light bulb should light up. At the time of the passage of the spark between the pencil and the detail will be engraved.

Actually, what good is this method: It is extremely simple, does not require any costs, almost everything in the apartment has everything you need to assemble such a device. For such an engraving it is not necessary to have any special skills, it is enough to be able to draw with a pencil. But there are also disadvantages to this method, after all, we are dealing with mains voltage, and this method is relatively insecure. As a result of this engraving, we get an inscription etched on the metal with a depth of about 0.1 mm, with a lamp power of 100 watts. The greater the power of the device, the deeper the etching will be. The inscription initially comes out black, bright, but its brightness can be changed with emery paper to an almost invisible embossed inscription. 
I think it would not be superfluous to describe the safety precautions when working with this device:
1) Do not work on a bare concrete floor, work only on an insulated surface, ideally on a dielectric mat.
2) There is a voltage of 220 volts between the pencil lead and the vanished part, so if you take the pencil lead and the part at the same time, you can get an electric shock.
3) If you are not good friends with the electrician, it is better to get around this way.
4) Before starting work, make sure that there is a zero on the part, not a phase.
Well, the rest of the rules as when working with any other electrical appliances.
For those who do not really understand how to assemble the device with my words, I post the scheme.

That's all, thank you all for reading, see you soon!)
With the help of engraving you can make each thing special, unique. Thanks to the pattern or pattern carved on the surface of any object, it acquires a special value. Engraving is an ancient art that has long graced and continues to decorate life, making it brighter, more interesting, richer.
If earlier the engraving was done exclusively by hand, today there are specialized devices and devices that allow you to make any pattern, drawing or inscription in a mechanized way. This area is constantly being improved, thereby expanding the possibilities of engraving. Today, different methods can be applied and various materials are processed: leather, glass, metal, plastic, wood, etc. Qualitative and aesthetically attractive patterns, inscriptions, slogans, drawings, photos and various images can decorate bowls, tablets, lighters, jewelry, leather accessories, charms, etc.
Hand cutting
This method of engraving began to use the very first. It is also called artistic engraving. Incredibly complex and time-consuming, he places high demands on whoever manually puts an image on the surface of an object. With the help of a cutting steel tool, the engraver creates lines and points of various indentations on the material. Thus, an image is formed on the surface. How much mastery and endurance is needed!
Each such work is exclusive. To create it, the master needs to spend a lot of time and effort, so the cost of the masterpiece will be high.
Laser engraving
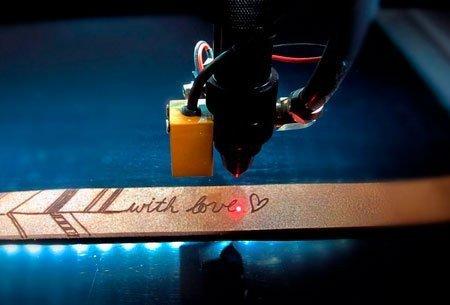 This type of engraving is the most common today. A certain pattern is applied to the object using a laser beam, which is focused with a lens and special mirrors. At the same time, the laser beam is so powerful that it evaporates some of the material and is even capable of cutting it. In the place where the laser acted, an imprint remains, which makes it possible to apply all sorts of inscriptions, patterns, drawings, etc.
It is used on an industrial scale due to its high speed of implementation and the possibility of using this method for applying images to different types of surfaces.
Today, two types of laser markers are mainly used:
- Gas (CO2). They are used for engraving on non-metallic products from acrylic, wood, leather, plastic, glass, etc.
- Fiber. This type of laser is more common for the application of the pattern on the metal. But, depending on the type of laser, can be used on other materials.
The main advantages of laser engraving:
- High accuracy. The image is so detailed that you can perform the most delicate work.
- Aesthetics. Such pictures look great, neat.
- Durability. The drawing caused by the laser, can remain almost forever. If many other patterns made with the help of other methods wear off over time, then laser patterns are unlikely.
- The risk of deformation of the object is eliminated due to the fact that during processing it does not heat up and there is no need to fix it.
- The cost of the finished item is lower than the cost of those things that are made by hand or in any other way. Automation of production allows you to perform bulk orders. In addition, reduced production time.
- Versatility. Laser engraving can be used for almost all types of materials.
So, laser engraving is a high-precision method that allows you to create any imaginable and inconceivable drawings on metal, wood, plastic and other materials. It is widely used for mass production of souvenirs and exclusive gizmos.
Sandblasting
 This method is also called abrasive machining. Its essence lies in the fact that the surface of the material is specifically damaged by sand or some other abrasive powder-like substance, which is sprayed with a strong stream of air. At that moment, when the sand from the specialized apparatus hits the surface, a matting is formed. Depending on the level of pressure and the granularity of the sand, various effects can be created. Through the use of various stencils, it is possible to put any drawing, photo and other images on objects.
The sandblasting method is used primarily for working with natural stone and glass. The resulting matting looks great on them. For the manufacture of awards and souvenirs are often used brick and granite. The method can also be used for processing wood, ceramics, metal, plastic. It is possible to work in this way with lead and optical crystal.
Big plus sandblasting - versatility, breadth of application, high speed. The edges of the engraving are smooth.
 This method involves the creation of a pattern on the surface of the material using a rotating very sharply ground mill.
Today, two basic types of mechanical engraving apparatus can be used: a pantograph (hand-held equipment) and a computerized one. The first type is used mainly for the manufacture of jewelry, family jewelry, glasses, vases, etc. But, nevertheless, the most common is the computerized method.
Within the limits of mechanical engraving there is also a diamond engraving method. The main difference is that there is a diamond plating on the cutter, due to which the finished engraving turns out to be more durable, durable, practically not erased.
Engravings created by mechanical means are obtained in bulk. But, the main disadvantage of this method is low productivity, if we compare it, for example, with a printed picture. But, on the other hand, images remain for many centuries.
Laser sublimation
 Laser sublimation is used to color various materials with images. To do this, you need a color printer, sublimation cartridges, a heat press, sublimation paper or metal.
In order to get the necessary image, you first need to print it. Get the so-called transfer. After that it needs to be placed on top of the product. Due to the effects of high temperatures, the paint will transfer to the product, leaving the desired pattern on it. In order for sublimation dye to imprint on the surface, it must be a polyester product or at least have a special coating. Only in this way is the image firmly fixed on the product.
Laser sublimation allows you to put different images on a variety of items: jewelry (bracelets, pendants, earrings, etc.), watches, stands, bookmarks for books, flags, T-shirts and much more.
The great advantage of this method is its ability to produce color, even the most colorful and attractive images. The resulting products are relatively affordable, so it is widely used.
Raster and contour engraving
Engraving can be applied raster or contour method. A raster is an image creation using a set of dots (raster). These points, merging, create a drawing on which there are areas of greater and less darkening. If we are talking about contour engraving, then in this case, the picture is formed as a result of applying contours. Most of all, it is suitable for drawing numbers, letters, thin lines. Compared with raster engraving, contour is more economical and in terms of financial costs and in terms of time costs.
Engraving on different materials
Engraving can be created on different materials: leather, glass, plastic, wood, metal, etc. Each of them has its own characteristics, which may differ somewhat depending on the method used for applying the engraving and the properties of the material itself.
Wood engraving
 Laser engraving on wood works as follows. The beam acting on the material provokes a strong increase in its temperature, due to which its actual evaporation occurs. As a result - a smooth surface with a beautiful pattern without burnt edges. No sawdust and chips remain after the work of the machine.
You can work with different types of wood. One like softer ones - such as pine. For her, a low power laser is suitable. Some people like wood with greater density - birch, walnut, maple. Often engravers apply images on sheets of birch plywood, MDF, fiberboard. For example, plywood can make blanks that later turn into original paintings, postcards, photo albums, etc.
Wood engraving can be applied to the finest wood. From the veneer or bamboo learn beautiful decorative lanterns, cutlery, toys.
When processing wood, a number of parameters are taken into account:
- the amount and size of wood fibers;
- tar, etc.
For example, engraving on products from coniferous trees is multi-layered due to the increased resin content. In bamboo, there is a large amount of fibers of very different density, which creates the most unusual products. But the images on cherry, walnut, linden and other deciduous trees look uniform, with the same depth.
 People began to create an engraving on this material for a long time. Previously, of course, methods of manual processing were used, thanks to which they obtained various drawings on weapons, household items, jewelry and other items.
As with any other materials, engraving on metal has its own characteristics. For example, to get a deep image, you need to spend a lot of time. If you create a souvenir product, which will mainly stand on the shelf, suitable surface "light" engraving. But if this item is planned to be used frequently, then the engraving should be deeper and more expressive. Such products will cost more.
The color of the engraving will depend primarily on the power of the laser beam. Therefore, the image can turn out to be very bright, and dark gray and even black. But in order to make a black drawing, after its application it is necessary to process the image with a special acid - “blacken” it.
Engraving on metal today is applied mainly with a laser marker or a milling machine. This is a specialized equipment, in the work with which you need to show special skill, the ability to interact with it. At home it is impossible to create such prints, as in professional companies.
 Different patterns, patterns, symbols and images can be applied to the skin. Since this is an organic material, it has its own peculiarities of processing. If an engraving is created using a laser machine, the surface exposed to the beam changes its color to black. Also remains ash or ash, which are washed away with soapy water.
Most clearly visible is the engraving on the skin of light tones: milky, beige, gray, light brown. If white skin is processed, a yellow border may appear around the pattern. Although black skin is engraved in the same way as other shades, the image can be lost in some cases. But, experienced specialists always find a solution to this problem.
 Glass items are often processed in order to create unique gizmos, souvenirs, jewelry. These are vases, glasses, bottles, perfume bottles, etc. If earlier a mechanical method of applying images on glass was used, today they are replaced by a high-tech laser method. Thanks to him, the engraving is obtained detailed, precise, which can not be said about the mechanical and, especially, the manual method of processing. In order to make a large batch of products, you will not need to spend a lot of time and, accordingly, money.
The features of glass engraving are as follows. Images on both transparent and colored glass are usually light. In addition to the higher quality and more expensive glass, the more difficult it is to work with it (to achieve the most accurate engraving is many times harder). But, for professionals who regularly work with different types of materials, this will not be a problem. They are able to achieve the same quality results.
 Acrylic, double-layer plastic or finished products are most often processed. When engraving is applied to a two-layer plastic, its top layer is removed, resulting in an image (it may be of a different color depending on the color of the layers). If transparent or monochrome plastic is processed, then special paints are rubbed into the resulting drawing to make it contrasting, expressive. But it is possible and not to paint transparent plastic, since the image is light and can be seen quite well.
Depending on the composition of the plastic (and it can be different - polystyrene, PVC, acrylic, etc.), the engraving can be different.
Is it possible to engrave at home
Someone is trying to create an engraving on their own. Someone has even tried it. DIY engraving is not an easy process that not everyone can do. If you want to create even an uncomplicated picture, you need the ability to draw and some devices. And the more beautiful and high-quality image you need, the more talent and experience you will need.
At home, several engraving techniques can be used. In some cases, a drill is used, the principle of operation of which is similar to the principle of operation of the dental apparatus. It has several tips that allow you to create inscriptions and drawings of various types.
Some craftsmen apply various patterns and patterns on the metal surface using a minimal set of available tools: toothpicks or matches, nail polish, salt, telephone charger, nail polish remover. It looks like this. First, the object is covered with a thick layer of nail polish. After that, using a toothpick, the desired pattern or image is scratched. In a glass 2 tbsp. l salt, which is filled with water and stirred. Now you need a charger to attach a minus to any metal object, and a plus - to the object on which the engraving is done. The second object is placed in water with salt, and then the charger from the mobile is turned on. It is necessary to carry out such a procedure for about 5 minutes, after which wipe the varnish from the pattern. The picture may turn out more or less tolerable, but one cannot speak about its high aesthetic properties and durability.
You can even purchase special kits designed for engraving. But in fairness it should be noted that it is very difficult and sometimes impossible to create with your own hands, for example, engraving on metal, as with a laser marker or a milling machine. And this is not surprising: professional equipment in the hands of a specialist is a guarantee of applying a neat, beautiful, contrast and durable image.
If you want to make a high-quality engraving that would be ideal and for a very long time retained its excellent aesthetic qualities, please contact us - professionals.
Our company:
- has at its disposal modern equipment that allows you to achieve the most accurate, detailed, high-contrast, durable images;
- engraves on different types of surfaces, objects made of wood, metal, glass, plastic, leather and other materials;
- performs tasks quickly and efficiently;
- undertakes wholesale and retail orders;
- offers competitive prices.
We will engrave on different types of surfaces and objects. If you have any questions, please contact our specialists. We will be happy to help!
Engraving equipment, with which you can successfully perform various technological operations, is now actively used by both professionals and home craftsmen. Although it is not a problem to purchase such a device on the modern market, many of those who would like to have it in equipping their workshop do differently and make an engraver with their own hands.
Despite the simplicity of the design, homemade engraving machine allows you to successfully perform the same technological operations as the engraver of the production model. Such operations, in particular, include:
- milling of flat and shaped surfaces, as well as holes and grooves of various configurations;
- drilling and boring holes of small diameter;
- cutting sheet material;
- cleaning the product from traces of corrosion and other persistent pollution;
- drawing on the processed surface of inscriptions and patterns;
- grinding and polishing.

Materials that can be handled by a homemade electric engraver are metal, wood, plastic, ceramics, glass, bone, artificial and natural stone.
What is required
The functionality, reliability and technical characteristics that an improvised engraving machine will have will depend entirely on what materials and mechanisms you will use to make it.

To make a simple, but easy to use and functional engraver, you will need the following components.
- Flexible shaft and working attachment to it, in the clamping mechanism of which the tool will be fixed. As a flexible shaft for an engraver, you can use a drive shaft from a drill or a cable that drives a car or motorcycle speedometer. The working nozzle can also be removed from the drill or made independently from a PCB bar, turning it to the required diameter and drilling a stepped hole in its inside. The diameter of the hole in the working nozzle of the engraver must be chosen in such a way that its walls securely hold the fixed part of the drive cable, but at the same time do not prevent the rotation of its moving core. A tube is inserted into the hole in the front of such an improvised working nozzle, inside which the chuck of the two halves, which are fastened together with a screw, rotates freely. In the cartridge, which must be balanced, you can install a tool with a shank diameter in the range of 2-5 mm.
- A set of tools with which processing will be performed. If as a working nozzle for a homemade engraver, you use the handle of the drill, then the tools should be from dental equipment that fit it on the diameter of the shank. For homemade working nozzles, as mentioned above, any tool with a shank diameter from 2 to 5 mm will work.
- Drive motor, which can be used as any motor powered by an electric current of 220 volts. This could be an engine from a DVD player or from an old reel-to-reel tape recorder, a washing machine, or from any other household appliances you don't use. The electric motor from the sewing machine is optimal for a self-made engraver, because there is already a rheostat in its equipment, which makes it possible to regulate the shaft rotation speed within fairly wide limits. Such engines, as a rule, are capable of developing a shaft rotation speed of up to 6 thousand rpm, which is quite enough for a domestic engraver.


Bed Casing Bracket and clamp
Sleeve and Angle Holder Motor Wiring Diagram
For the manufacture of the engraver, you will also need a power drill, a grinding machine and a standard set of plumbing tools.
The principle of self-made engraving machine
The homemade engraver of the proposed design works according to the following principle. Rotation from the electric motor through the pulleys and rubber belt is transferred to a flexible shaft, which, in turn, informs its working nozzle and the tool fixed in it.
The engraving machine with its own hands can be made in another design, which assumes that the flexible shaft is connected to the electric motor through a transition coupling. One end of this coupling is mounted on the motor shaft and securely fixed on it with a pin, and a movable core of the flexible shaft is inserted into a square hole made at its second end.

After all the constructive elements of the future homemade engraver are prepared, proceed to its manufacture.
- For reliable and stable mounting of all elements of the engraver's construction, it is necessary to make the simplest base frame, for which you can use a sheet of textolite or thick plywood, cutting a piece of the required size from it. At pre-marked points on the surface of such a base, an electric motor and a bracket with a collar are attached, in which the rear tip of the flexible shaft will be fixed. After tightening the mounting nut on the bracket clamp, the end of the flexible shaft should be securely fixed in it.
- Pre-prepared pulleys, which can also be removed from old household appliances, are fixed on the motor shaft and on the movable core of the flexible shaft. To perform such fixation, it is necessary to drill holes in the flange part of the pulleys and on the shafts, into which the pins will then be inserted. To ensure the reliability of the connection will help the usual epoxy resin. The transmission of rotation from the electric motor to the flexible shaft, carried out with the help of pulleys and belt wheels, is convenient in that by changing the diameters of the pulleys used, it is possible to adjust the rotational speed reported by the rover.
- The final stages of manufacturing the engraver of the proposed design are the installation of a rubber belt on the pulleys of the flexible shaft and the electric motor, connecting the motor to electrical power, fixing the working nozzle with the tool on the front end of the flexible shaft and testing the finished device.
To make your engraver safer in operation, make a compact casing for its electric motor and belt drive (you can use regular plywood). Since the hands while working with the device are occupied by holding the workpiece and the working nozzle, it is possible to equip the engraver with a foot pedal to turn it on and off. The main element of such a pedal, the body of which is also often made of plywood, is a conventional jog button.
As a drive for the engraver, you can use a grinder with a “flying” gearbox.
When deciding what type of flexible shaft to use to equip your homemade engraver, it is better to choose drive elements from dental machines. It is recommended to do this for the reason that such shafts, even those removed from old drills, are already equipped with working nozzles with collet-type clamping mechanisms, in which the tool used is fixed and securely fixed.
Meanwhile, the use of a flexible shaft from a dental drill as a drive element of the engraver's attachment has certain inconveniences. They consist in the fact that dental instruments can not always pick up the tools required when working on an engraving machine. This problem is solved quite simply: many tools for the engraver can be made by yourself, using the available materials for this.

We will need the following materials:
- Power supply (battery) 9 V;
- A glass of water or other container (only non-metal), depending on what you do engraving:
- Nail polish;
- Nail polish remover (solvent);
- ordinary salt;
You can make an engraving on the metal as follows:
- Apply a layer of varnish on the surface of the metal (in our case the handle of a teaspoon). It is necessary to cover the entire surface, which will be immersed in water for engraving. Let the varnish dry well (about an hour). As a rule, the badly dried varnish will later be slashed from the spoon, and engraving may not work. Then we write the inscription (in our case, a toothpick is used) on the lacquer in such a way that the metal would appear through. It is in this place that the metal will be etched.
- Take 2 full teaspoons of salt and dissolve in a glass of water.
- We clean the power supply wires so that we can connect to the metal, and determine where the plus and minus are. The minus is usually monochromatic (black) wire. Plus, on the contrary, it goes either in red or in a different color, but with some kind of strip.
- We fix the minus to another teaspoon (you can also use a piece of steel), and fasten it to a spoon on which engraving will be done.
- The whole thing is immersed in a glass with a solution of salt, whatever they come into contact with each other.


I just want to warn you that when etching, harmful vapors (chlorine) are released. Therefore it is necessary to work in a well-ventilated area. In general, do not stick your nose in a glass of water. Then we connect our power supply 9 V to the outlet. We are waiting for 10 - 15 minutes and disconnect the power supply from the network. We look at the result. If the engraving turned out not the depth that you would like, you can turn on the unit for a short period of time.
At the end of the engraving process on the metal, erase our varnish with a solvent (nail polish remover) and enjoy the result. By the way, I made a small engraving on the knife with this method,.

Video engraving on a spoon (knife):
In my opinion the easiest and most affordable way to apply engraving on metal. You can make a personalized spoon or knife as a gift. It will look very original and peculiar. Do not forget to observe the elementary safety precautions at work and before new meetings.


