Quite often, old furniture that has lost its original gloss remains strong and reliable, quite suitable for further use. Therefore, the question of how to paint furniture from chipboard with your own hands is interesting to many. And the reason is not only the lack of funds for a new one.
If a cupboard, chest of drawers or a cupboard is comfortable and fits well into the space allotted for them, why look for something similar, if you can update what is?
It would seem that it could be easier than taking a brush, paint and?
In fact, in order for the new coating to lie smoothly, adhere well to the surface and hold on to it for a long time, it is necessary to follow a certain painting technique. And here everything is important from the choice of tools to the application of the finish layer.
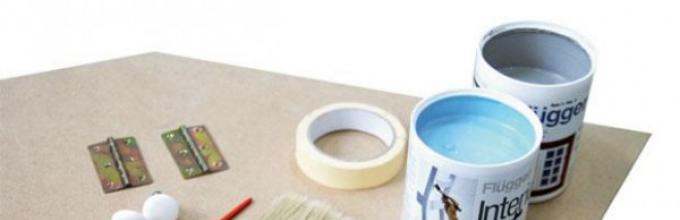
Tools and Supplies
Preparation for work begins with thinking about the design. After all, furniture can simply be covered with a layer of fresh paint, or it can be painted in different colors, painted, artificially aged. The choice of tools, paints and other needs will depend on this.

The tools that will be needed in any case include:
- Brushes of different sizes or rollers with a short pile (see);
- Screwdriver or screwdriver;
- Fine and coarse sandpaper;
- Putty knife;
- Tray for paint;
- Gloves;
- Rags.
In addition to them, you may need masking tape, art brushes, new furniture accessories, stencils, stamps, etc.
Finishing and paint materials
Decide what paint to paint the furniture from chipboard. Special furniture varnishes and enamels are best suited for this purpose, but it does not have to be these. In principle, oil, acrylic paints, and alkyd enamels, including in the form of an aerosol, will well fall on a properly prepared surface.

Tip. Choose paints and other coatings of only well-known manufacturers, such as Tikkurila, Dulux, Yaroslavl paints, Rainbow, Blossom, Tex. Their price is higher, but the quality of staining and the service life of the coating are incomparable with the same parameters of cheap compositions of unknown origin.
The most environmentally friendly and harmless are water-soluble acrylic paints, which can be given any desired shade using special pigments. If you are repainting furniture for a nursery, it is best to use them. But paint alone for restoration work is not enough.
In addition to it, you will most likely need:
- and chipboard;
- Rinse to remove old paint;
- Solvent (for acrylic paints - water);
- Lacquer.
The primer is necessary, varnish - at will, the rest - depending on the initial condition of the furniture and the freshness and density of the paint.
Calculating the required amount is quite simple: calculate the area of \u200b\u200bthe surface to be painted, multiply by the number of layers that will be applied, and divide by the average consumption. This characteristic can be found on the label, there is also an instruction for using the composition.
Staining technology
If you are going to just open the paint, dip a brush into it and start painting, this is wrong. Before repainting furniture from laminated particleboard, you need to perform a series of preparatory work.
Surface preparation
To begin with, you should disassemble a cabinet or chest of drawers. Not completely, but it is necessary to remove the doors, pull out the drawers and unscrew all accessories from them. At the same time, check how well the loops and other elements have been preserved. They may need to be replaced.
Then each part must be prepared for painting:
- If it is necessary to remove the old paint layer, it is cleaned off with rough sandpaper, after which the surface is brought to a smooth fineness. If this layer is smooth, without peeling and scratches, and you just want to change the color of the furniture, you can skip this step.
Tip. The method of removing paint by stripping is quite dusty and labor-intensive. You can do otherwise: heat up a layer of paint with a building hair dryer and clean off with a metal spatula. There are special washings that are used in strict accordance with the instructions.

- The next step is dust removal and surface degreasing. To do this, wipe it with a damp rag, and then wipe it with a solvent.
- If on the front side of the furniture part there are pits, irregularities and cracks, they need to be puttied with acrylic putty on wood, allowed to dry and level with the smallest sandpaper. Of course, the dust formed is removed.

- The last preparatory stage is the application of a primer in one or two layers, depending on the degree of absorption of the base. Each coat should dry well before you apply or coat.
Even before you start priming the furniture, you need to get rid of the dust floating in the air and lying on the surfaces. Especially if you chose tinting or varnish as a decorative coating for old furniture.
Painting
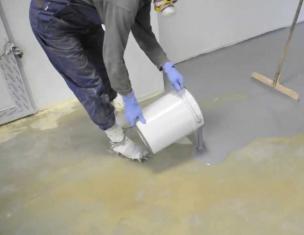
We have already talked about what paint can be used to paint furniture from chipboard. But the preparation of the paint depends on which one you have chosen. If this is an aerosol, then the can should be shaken well before use. The furniture part is laid on a layer of old newspapers or film so that the paint does not stain other surfaces.
Tip. When working with alkyd formulations, use a respirator or multilayer gauze dressing.
Too thick oil paints, enamels and varnishes are diluted with a solvent to the desired consistency, acrylic - with water.
The first background layer, regardless of the coloring technology, is applied with a brush or roller all over the surface and left to dry. Drying times are indicated on the label.
Then, in the case of one-color staining and in the event that the base color appears from under the first layer, the second is applied. And after it dries - varnish. Although you can do without it.

If you decide to paint the furniture facade in several colors, then masking tape is glued to the border between them, which is carefully removed after the color section has dried.

In the same way they work with stencils for applying a pattern or ornament.

Having finished staining, the parts need to be allowed to dry for several days so that the coating gains strength. And only after that they begin to assemble furniture and install accessories.
Conclusion
As with many other construction, decorating and restoration works, when repainting old furniture from chipboard, preparatory work takes up most of the time and effort. But if they are neglected, the result can be even worse than its original state. Or the coating will begin to peel off quickly and crack.
In order not to be disappointed, you need to follow the technology exactly. A video in this article will help you consolidate the information received.
Have you ever experienced this itching in your hands and a burning desire to do something with this old cupboard or chairs, which you inherited and callused your imperfections? Well, or just to understand that you want changes, but are you not ready to invest in a complete replacement of the interior?
There is a solution: take a closer look at the items you want to update, come up with a concept and go to the store. For the paint. Because to take and paint the furniture that you are tired of - it is very simple.
how to paint furniture
Repainting old and worn furniture can solve several problems at once:
- refresh the interior (which is logical);
- to combine diverse items into a single ensemble (for example, if you are a young family, and from furniture you only have what was inherited, well, or even often, individual objects from different eras accumulate in the country that need to be somehow made to work together);
- give an outlet to your creative energy (the most important, I think).
Well, if you do everything right, then no drama will happen, even if you do not like the result - you just choose a new shade and can paint the furniture again when you again have a couple of hours of free time.

Color selection
Look carefully at the subject and think exactly where you want to enter it - the choice of color depends on it. You can choose a shade contrasting with the main gamut (for example, in a room with a beige-warm gamut you can put a table painted in bright blue - it will enliven the interior with a color accent), or neutral (for example, you can paint an old table and chairs in white color, and put on it a beautiful vase with bright colors).


Paint selection
Go to the largest of the nearby hardware stores, catch the manager and explain the task - you need a universal paint that is suitable for painting wood, plastic and varnished surfaces (such exist). You can choose a hue right on the spot if you have some idea of \u200b\u200bwhat you want. Although you can paint furniture with different colors, and you will need the help of a specialist to understand what is best for you:
- Latex paints (they are easiest to find, many different shades and relatively inexpensive), minus - before applying, you will need to spend time preparing the surface (how to clean it with solvents and sandpaper), which in itself eats up a lot of time.
- Chalk paint (chalk paint) - a real hit in painting furniture, they do not require special preparation, go well even if you are a neophyte, and mask flaws in the application and surface roughness. Most of what you see on Pinterest in pictures is painted with exactly these colors, but they are more difficult to find (although you can buy anything on the Internet with delivery). Chalk paint lays well and diverges, leaving no brush marks.
- Acrylic paints are the oldest and proven way to repaint something. They fit well, and the brush mark diverges when the paint dries. But at the same time, they give a light shine and the effect of “painted wood”, while chalk paints look more organically.
In addition to paint, you will need brushes, scotch tape to protect areas that you don’t want to paint, plastic film to protect the surrounding interior, sandpaper to prepare surfaces and wax to polish already painted furniture.
Ask the seller if you need to especially prepare the furniture - perhaps you will need to buy a primer, a base that is applied to the wood before applying your chosen paint.

Coloring
If you choose a paint with a shade, shake the jar properly before opening it - sometimes the pigment settles at the bottom. Allow yourself time not to rush and how to deal with how to apply paint.
If you have chosen a paint that requires surface preparation before application, then do not skip this step. You can clean the surface with sandpaper (take with the number 220, it is universal).
If you have never painted anything before, then practice on some old stool first, well, or buy something cheap, and practice on it before disfiguring your closet. You always have time to paint the furniture, it is better to fill your hand first.
If you do not have experience, then you should not start with painting the shelves - this is difficult, because you need to paint over all surfaces (and angles are the most unpleasant) evenly. Leave them alone for the last time with a repainted chest of drawers and a pair of chairs.
Never start painting an object from the main surface, always start painting from the back wall or lower surfaces to give yourself the opportunity to “shoot” and stop if you absolutely do not like the shade.
Use flat, wide brushes, not rollers - on uneven surfaces with a texture (wood), the brush works better, since it dyes all the cavities and cracks.
Most paints require reapplication - after the first layer has dried, apply a second, so the brush marks become invisible, and the color is more even. Chalk paints are quite dense, and sometimes one layer is enough, see the result.
When you paint on one side of an object, periodically inspect for drops of paint on other sides. For example, you paint the side of the cabinet, and droplets of paint can fly away and settle on the already painted doors. Your task is to prevent them from drying out, so just periodically look at other surfaces. If you see treacherous drops, then simply swipe them with a brush, when the paint dries, there will be no residue.
And do not forget about the final stage - polishing with special waxes for furniture. Wax will not only give things a new glossy appearance, but also protect surfaces from stains and scratches.
Good luck!
In any home, the cabinet occupies a very important place. It is a pity that over time it loses its original appearance: the appearance of cracks, tarnished paint makes it unattractive, it goes out of fashion and looks irrelevant. We have to think about his future fate.
At least two ways out of this situation:
- purchase of new furniture;
- updating the old cabinet.


With your own hands, you can give the chiffonier a new life, turn it into a unique object, while saving considerable money.
How to restore?
Any antique cabinet requires a small restoration, which will significantly improve the appearance.
You can restore the wardrobe by yourself, if you use the advice of specialists:
- A metal brush is used to treat decayed wood, after which dead tissue is removed.
- The resulting fine dust is washed off under running water.
- Sometimes in the wooden elements of the cabinet there are holes from studs, some irregularities and cracks. All this must be cleaned with a spatula. It is necessary to apply several thin layers of putty to match the wood. Each coat must dry before applying the next.
- Then all layers are dried in the fresh air for 1-2 days. You can not dry a tree in the sun.
- Sometimes in furniture there are metal parts that have managed to rust over time, such places should be treated with a special solution.
- Then, the restored surface can be painted or decorated at your discretion.
- Self-adhesive film imitating wood, stone, metal is perfect.

How to paint?
A wardrobe that has gone out of fashion, but is still quite strong and will last more than one year, can simply be repainted. In such a simple way, a new design of cabinets, chests of drawers and any other old furniture is created. This is not only about giving freshness to tarnished surfaces, but also about completely replacing the color scheme, which will add originality to the product. Painting is the most common way to update an old thing. Despite its simplicity, it is necessary to approach this process correctly. For a long-lasting result, you need to pre-prepare the furniture walls.


Below is a step-by-step master class.
It will help to qualitatively and competently paint at home:
- it is important to pre-clean the surface of paint residues: one layer will easily remove the emery-petal disk, special brushes will cope with several layers as a nozzle;
- all walls, doors and other parts must be sanded manually or using a tool;
- alignment occurs by applying a primer or putty to hide defects that have arisen during many years of operation;
- it is necessary to wait until the leveling layer has completely dried, and then you can start painting;


- to apply the paint layer, brushes, a roller or a sponge are taken from all sides, however, it is faster to use a spray gun or spray gun. With this method, the paint is applied under pressure, so the doors, shelves and walls inside the cabinet are well stained;
- as a rule, several layers of paint are applied. This provides a rich color and good surface preservation. It is better to paint the cabinet with acrylic, alkyd enamel or other high-quality paint;
- the paint must be allowed to dry completely, after which a varnish coat can be applied. It makes the cabinet glossy and shiny. If you prefer a matte surface, you can opt out of varnishing. However, the use of this coating has a protective function, prevents abrasion and gives the tone a greater depth. You can use not only glossy, but also a matte and silky finish.


Decor
If you decide to leave and decorate the old cupboard with your own hands, it is possible to decorate it in different ways. There are many techniques that are used for decoration.
Decorative plaster
This is a rather complicated decoration option. First, the product, covered with old paint, must be treated with sandpaper. According to the stencil, it is necessary to apply volumetric elements to the cabinet facades with decorative plaster. The stencil itself needs to be removed before the plaster dries. Then the uneven parts are smoothed out using a spatula. Finished decorative elements are varnished or painted, gilding or antique patina is possible.


Photo printing
A wardrobe or just an old wardrobe is very updated with photos or murals. Any photographs are enlarged using large format printing in a print shop. The surface is decorated with panels or a collage of photographs, most often these are sliding wardrobes with smooth doors. However, the service of such printing is expensive, so the budget option is more often used - murals that are sold in any repair shop. Choose a variety of topics - nature, beautiful cities, animals and much more. If you use glue based on starch, in the future it will be possible to change the boring pattern.


Stained glass film
You can decorate an outdated piece of furniture yourself without special skills. It is very simple that a stained-glass film fashionable this season is pasted onto a glass cabinet door. This will add a presentable old furniture. In addition to the decorative function, the film keeps the glass from impact and scratches. It is very simple to remove the film, and such a decorative technique looks very impressive, because the imitation is as similar as a real stained glass window.


New hardware
There are no trifles in the decoration process. Every designer knows that 40% of the success of any interior is in parts and accessories. In this case, you can unrecognizably transform the cabinet by changing all the fittings on it. New pens are important.


It is a pity if you have to throw away old, but high-quality furniture, especially wooden. But such products can be updated and used for more than one year. For a competent choice of decoration method, it is important to consider the material and the degree of wear of the old cabinet.
Natural wood
Previously, wooden furniture was made very high quality. Before updating, remove dust with a dry rag. Then check the hardware, and if it is broken, it must be repaired or replaced. Inside the cabinet, it would be nice to carry out treatment with an antibacterial agent, a more budgetary option is simple vinegar. It will destroy the bad smell.


Then the choice of decor method is made.
- Toning.First, all surfaces are leveled with wood putty, matched to the tone of the cabinet. After the layer dries, uneven places are sanded with sandpaper. Machined and even planes are treated with special structural tinting for wood. Choose a decorative tinting color darker than the original shade of the cabinet. Such processing will completely transform the appearance of the product.
- AgingNatural wood furniture can be “aged”. The effect of antique worn surface of the cabinet is achieved as follows: the light tone of the wood is painted in any dark shade, depending on the color palette of the room. Then, after the paint has completely dried, it is necessary to rub several fragments with a candle, after which light paint is applied, for example, beige, white, cream. When after the second painted layer is rubbed with sandpaper, scuffs will be visible through some bright places. which are darker. When a dark wardrobe is decorated, craquelures are made. To do this, apply craquelure varnish to the surface. After it dries, small cracks form, which are released using a dry pigment or oil paint of the desired shade.
 Tinting
 Aging
Aging
- Painting. This option provides for preliminary staining with furniture paint in a light shade. After drying, the facades of the cabinet are painted with acrylics. If you do not have the skills of drawing and painting, you can paint a cabinet on a stencil.


Chipboard
If the cabinet is in good condition, it will be possible to use the same decoration options for decoration that are used in the design of wooden products, excluding tinting. The cabinet in poor condition involves replacing the doors.
- Dark polished. In our country, the cult model of such a cabinet was extremely widespread. The decor of this product is very complicated in terms of modernization, since the synthetic dark lacquer used previously for polishing furniture is almost impossible to remove. In addition, other decorative materials do not adhere to it. Here it is necessary to make a strong-willed decision and replace all the doors, if they are in poor condition. A well-preserved cabinet can be redone in one of two ways:

- Tupovka - toning using a sponge. For application, golden or copper metallic paint is taken, which even lies on such a polish. The application technique is distinguished by the fact that in some places the coloring layer is packed with the sponge up and down. Then the perimeter of the doors is decorated with glued stucco made of PVC. In the central part of each door, a stucco molding socket is glued similar to the design of the perimeter.
- Screen ornament.To apply such an ornament, gold or copper paint is also used, but in an aerosol bubble. First, a stencil in the form of an ornament is glued to the cabinet door. After that, the basis for the paint is carried out using a stencil using an aerosol matte varnish, which acts as a primer. After 5 minutes, a tinted spray is applied. After a five-minute wait, you can remove the stencil.
 screen ornament
 blunt
blunt
Sometimes the original idea of \u200b\u200bupdating old things leads to a new one. A large number of diverse and unexpected tricks are recommended by designers. Among them:
- The decor is lace.In itself, a lace or lace fabric is unique and does not cause any doubt in aesthetic value. It is no accident that for him there are always a lot of applications in the field of decor, including furniture. Do-it-yourself exclusive furniture design is easy to make using it. You will need lace and paint. Apply a lace cloth to the facade in the right place and brush it with paint on it. Then the lace is removed, and the beautiful lace pattern remains on the facade.


- Decoupage. Perhaps the most amazing effect is the decoupage technique. The cabinet is decorated with napkins that have a suitable pattern on their surface; they can always be found in any hardware store. The pattern is cut out, delaminated and then glued with special glue for decoupage. The surface with glued drawings must be covered with furniture varnish. As a rule, it is applied in two layers. Such decor looks especially good on a light background. The cabinet, which was originally dark, must first be painted before decoration.

In the homes of modern people, furniture is one of the most important design elements: tables, cabinets, chairs and other items are always in sight, their appearance is very important. That is why it is customary to change old furniture to new, but there is another way to reanimate worn-out furniture elements.
Thus, an old cabinet can be presented with a new life in a completely different design, for which you just need to repaint it, and we will tell how to paint a cabinet in this article.
Preparing the cabinet for a design change

Is it possible to repaint a sliding wardrobe or wardrobe if it has lost a presentable appearance during operation and looks shabby and shabby? Of course it is possible and even necessary. Do not throw away old furniture also because today you are unlikely to find objects of such quality in a furniture store.

And the video in this article will help you see with your own eyes how you can transform the old cabinet.
Restoration or independent production of furniture is a rather complicated and responsible process. This is due to the characteristics of certain types of materials and the application of certain types of coatings on them.
That is why the question of how to paint a cabinet from chipboard is of great interest to many masters.
Step-by-step process
First you need to say that such work is quite difficult and tiring. People who want to figure out how to paint a cabinet from laminated particleboard or other similar materials do not even know what they will have to face.

Training
- First, the whole product will have to be taken apart. At the same time, professional craftsmen immediately recommend paying attention to the quality and condition of the fixing elements and, if necessary, replace them.
- When asking whether it is possible to stain varnished or laminated surfaces, it is necessary to understand that at first all structural elements are to be skinned. In this case, the old coating is completely removed.

- After that, the instructions for restoration require application to the surface of the primer. It will protect the material from various kinds of influences and increase its level of adhesion. (See also article.)
- Next, the surface is puttyed. For this, you can use special compositions, special attention, paying attention to defects and irregularities that arose during operation.

- Some masters prefer to putty only on problem areas, because they think that the smaller it is, the better. However, if it comes to restoration and subsequent staining, then it is worth covering the entire structure.
- After that, all elements are again sanded using low-abrasive materials to give the surface smoothness.

- At the final stage of the preparatory work, the cabinet is again treated with a primer and allowed to dry. At the same time, manuals telling how to repaint a cabinet from chipboard are recommended to withstand a time interval of at least 4 hours.
Advice!
Experts say that all the locking elements and other accessories for the period of operation come into disrepair.
Therefore, they must be replaced with new products, even if no visual defects are detected.

Painting
- At this stage, it is necessary to choose a dye. It is worth remembering that the price of modern materials for working with wood, namely furniture is very high. However, the volume of work is small, which involves the equalization of all costs.
- If there is no desire to acquire specialized compounds, then you can use the usual oil or alkyd paint.

- It is best to apply the material to the surface using a spray gun. If the work is done with your own hands, then it is worth renting or using spray cans. Otherwise, smudges are almost impossible to avoid.
- It is worth noting that all such work must be done in a well-ventilated area, at a certain temperature and humidity.

- The field of how the first coat dries can make an additional primer and apply the paint again. This prevents the appearance of oil stains or hides the texture of wood.
- When all work is done, the cabinet must be assembled, after which it is possible to correct defects or irregularities in the application of color with paint. It is worth noting that it is best to assemble after applying the first coat of paint with its subsequent drying. (See also article.)

- Many manuals telling about how to paint an old cabinet from chipboard, recommend that after all the layers have been applied and dried, the surface should be varnished. This will provide additional protection and give the colors contrast and brilliance. At the same time, professional masters argue that this must be done in several layers with thorough drying. (See also article.)
Advice!
The use of specialized or multicomponent compositions will greatly simplify the work, but when applying them, a number of certain conditions must be observed, which at the same time complicates it.
Professional craftsmen are always looking for options to facilitate their work and at the same time achieve the maximum possible result.

Output
After watching the video in this article, you can get detailed information about how to paint wooden furniture or chipboard products. Moreover, on the basis of the text proposed above, it should be concluded that this process is quite tedious and can take a lot of time. However, for its implementation does not need to have special knowledge or skills.